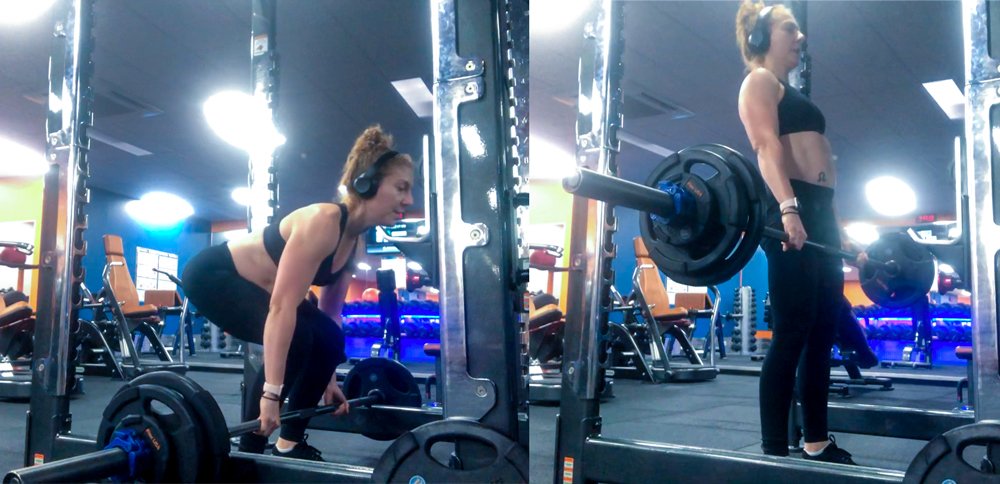
Dead-lifting above the ground for injury.
Left image is the first position in the movement, arched back, activating the glutes, then pulling upwards (right image), slightly over arching at the end of the movement to engage the glutes and hamstrings deeply.
Transition to floor dead-lifting when you have mastered this.
Dead-lifts are quite challenging to master when first starting out. I highly recommend that you keep trying to get your form correct. It is well worth the effort over the long haul.
Below are some basic instructions for positioning. I will then lead you to my instagram, as I will be featuring my own dead-lifting attempts, which fall short of the ground (about 10–15 cm or so). I begin in this position, as I’m still creating strength in my back, hips and glutes, without straining my back or hip too much. I recommend this or anyone slowly transitioning back to dead-lifts after an injury or imbalance. When you are strong enough during this phase, transition onto the ground for better muscle recruitment and activation.
4 steps to executing an effective dead-lift
- Position your feet under the bar, keep your knees bent and grasp the bar so that your shins are touching the bar or are extremely close (your feet should be shoulder width apart, facing forward.) If you are tall, make sure the bar is slightly in front of your shins. Your knees should be alighted with your feet.
- Always keep your elbows locked, slowly lower your hips so that your shins are nearly perpendicular to the floor. As you lower your hips into position, be careful not to bump the bar forward. This happens if you lower your hips too quickly. From there, arch your back. Because many people have trouble picturing this, focus on trying to lift your chest up instead. Do not pull your shoulders back at the start as this will increase the distance the bar has to travel
- Shoulders should be slightly in front of the bar or directly above it. If your shoulders are too far forward, the bar will move forward at the start of your lift, not your back. Your arms perpendicular to the floor and your arms are aligned with your knees. If your elbows are aligned with your knees and your arms are straight, the hips should be positioned slightly higher than your knees (but not higher than your shoulders)
- Head position should should be locked at a spot front of you. You want to make sure your head is aligned with your spine. Some people do find they are stronger when looking ahead. What you should be aware of is looking down, as this will encourage your back to flatten or round. Looking up will cause neck strain. Just find a spot directly in front of you and look ahead.
Please do begin this movement with less weight, so you can familiarise yourself with each step. View you-tube videos, and do some google searching to show you actual pictures and video of proper technique. Keep working on this movement, even a few times a day to get used to each and every step. Soon enough, it will flow easily, and you will be able to execute perfectly and with heavier weight.
Please check out my Facebook and Instagram if you would like to see my dead-lifts for injury transition.
With assistance from – Poliquin principles book